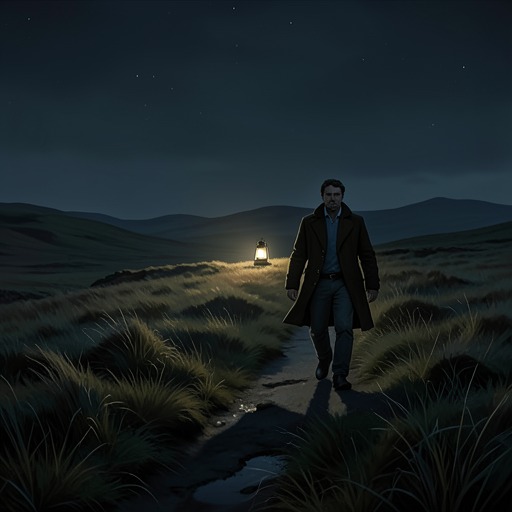
the morning after Dr. Mortimer’s first visit
Holmes Reads the Walking Stick
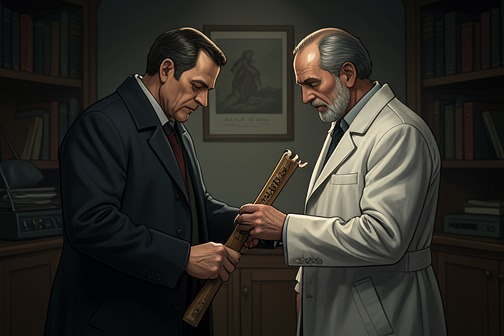
At breakfast in [Baker Street](entity:location-recall-location-baker-street-718489af2ecf), [Dr. Watson](entity:character-recall-character-dr-watson-b880596dce5c) examined a walking stick left behind by an unknown visitor and inferred that its owner was an elderly country doctor. [Sherlock Holmes](entity:character-recall-character-sherlock-holmes-47892918a33b) corrected most of his deductions, reading the engraved presentation, its date, and the marks of a dog’s teeth to reconstruct a younger, absent-minded medical man who had once worked at [Charing Cross Hospital](entity:organization-recall-organization-charing-cross-ho-829322458ff4).
The visitor arrived as Holmes finished deducing that the dog was a curly-haired spaniel. Dr. [James Mortimer](entity:character-recall-character-james-mortimer-90803bd6b1ab) confirmed some details, though he revealed that the stick had been given on the occasion of his marriage, not his departure from the hospital. He had come with a serious matter for Sherlock Holmes.
during Mortimer’s first consultation
The Family Manuscript
Dr. [James Mortimer](entity:character-recall-character-james-mortimer-90803bd6b1ab) produced a manuscript dated 1742, entrusted to him by [Sir Charles Baskerville](entity:character-recall-character-sir-charles-baskerv-e05384ca23ef). Its account traced the family’s troubles to [Hugo Baskerville](entity:character-recall-character-hugo-baskerville-d866e35dd89c), a violent man who abducted a farmer’s daughter and set his hounds after her when she escaped.
The legend described Hugo and the young woman dead on the moor, with a monstrous black hound standing over Hugo’s body. Its author warned the family to avoid crossing the moor at night. [Sherlock Holmes](entity:character-recall-character-sherlock-holmes-47892918a33b) dismissed the tale as folklore, but the story had shaped Sir Charles’s fears and would shadow the investigation.
three months before Mortimer’s visit
Sir Charles’s Death in the Press
Dr. [James Mortimer](entity:character-recall-character-james-mortimer-90803bd6b1ab) read a newspaper report of [Sir Charles Baskerville](entity:character-recall-character-sir-charles-baskerv-e05384ca23ef)’s death. The public account described a man whose health had been failing, who took nightly walks in [Yew Alley](entity:location-recall-location-yew-alley-98513a758bd5), and who was found dead near its far end after leaving cigar ash at the moor gate.
The inquest accepted heart disease as the cause and found no evidence of violence. Yet the report noted that Sir Charles’s footsteps changed after he reached the gate and that his face had been horribly distorted. The official explanation settled the matter publicly without explaining its most unsettling details.
during the first consultation
Mortimer’s Hidden Evidence
Dr. [James Mortimer](entity:character-recall-character-james-mortimer-90803bd6b1ab) explained that Sir Charles had been increasingly frightened by the family legend. Mortimer himself had once seen the old man stare in terror at something near the Hall, which he thought might have been a large black calf, and he knew that Sir Charles believed a dreadful fate threatened his family.
Mortimer had examined the body and the ground after the death. Although the inquest heard that there were no other tracks, he had found the footprints of an enormous hound near the body. He had withheld this evidence because he feared that publicizing it would strengthen superstition and leave [Baskerville Hall](entity:location-recall-location-baskerville-hall-74686e853850) empty.
the day before Sir Henry reaches London
The Heir’s Arrival
With Sir Charles dead, his nephew [Sir Henry Baskerville](entity:character-recall-character-sir-henry-baskervil-291b9d3a250e) became the heir to the title and estate. Dr. [James Mortimer](entity:character-recall-character-james-mortimer-90803bd6b1ab) had learned that Sir Henry, who had been farming in Canada, was arriving at [Waterloo Station](entity:location-recall-location-6646d656c4a6) and asked [Sherlock Holmes](entity:character-recall-character-sherlock-holmes-47892918a33b) how to protect him.
Mortimer feared that the last Baskerville would be in danger if he settled at the Hall, but also knew that the district depended on the estate’s renewal. Sherlock Holmes advised him to meet Sir Henry, say nothing of the case yet, and bring him back the next day for a fuller discussion.
the evening before Sir Henry’s first meeting with Holmes
Holmes Studies the Moor
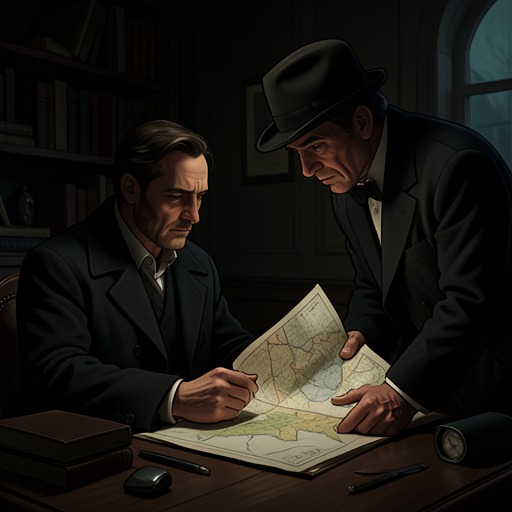
[Sherlock Holmes](entity:character-recall-character-sherlock-holmes-47892918a33b) spent the day studying an Ordnance map of the region around [Baskerville Hall](entity:location-recall-location-baskerville-hall-74686e853850). He identified the scattered homes, the nearby settlement, and the great expanse of [Dartmoor](entity:location-recall-location-dartmoor-b41339423479) where the coming events would unfold.
He reasoned that Sir Charles had not merely walked along the alley but had waited at the moor gate, probably for someone. When the old man fled, Holmes concluded, he had been running in terror rather than walking on tiptoe. The question remained what had frightened him and why he had waited there.
the morning Sir Henry meets Sherlock Holmes
The Warning Letter
[Sir Henry Baskerville](entity:character-recall-character-sir-henry-baskervil-291b9d3a250e) arrived at [Sherlock Holmes](entity:character-recall-character-sherlock-holmes-47892918a33b)’s rooms with an anonymous warning delivered to his hotel. Its cut-out words advised him to keep away from the moor, while the word moor had been written in ink.
Holmes identified the source of the pasted words as a leading article in [The Times](entity:organization-recall-organization-f40c542d0312) and inferred that the sender was educated but had taken pains to disguise the handwriting. The hurried arrangement suggested agitation or interruption. The warning might be protective, Holmes observed, or an attempt to frighten Sir Henry away.
during Sir Henry’s first meeting with Holmes
The Missing Boots
Sir Henry told [Sherlock Holmes](entity:character-recall-character-sherlock-holmes-47892918a33b) that one of his new tan boots had disappeared from the [Northumberland Hotel](entity:location-recall-location-northumberland-hotel-2769d2376e19). The loss seemed trivial, but Holmes treated it as significant, particularly because Sir Henry had bought the boots only the night before and had never worn them.
The men also learned that Sir Henry’s movements were being watched, though no one could identify the watcher. Holmes concluded that the boot and the warning belonged to a larger pattern of concealed intentions, and pressed Sir Henry to report anything else out of the ordinary.
later that morning
The Cab Pursuer
When Sir Henry and Dr. [James Mortimer](entity:character-recall-character-james-mortimer-90803bd6b1ab) left Holmes’s rooms, [Sherlock Holmes](entity:character-recall-character-sherlock-holmes-47892918a33b) and [Dr. Watson](entity:character-recall-character-dr-watson-b880596dce5c) followed them, hoping to identify a bearded man watching from a hansom cab. The spy recognized that he was being watched and fled through [London](entity:location-recall-location-london-420923d4a60a) traffic before Holmes could catch him.
Holmes had managed to note the cab’s number, but his eagerness had revealed that he was on the trail. He dispatched a boy to search nearby hotels for the mutilated newspaper page and set out to identify the cabman, believing that the stranger’s ability to follow Sir Henry made him a formidable opponent.
at the Northumberland Hotel that afternoon
The Heir Chooses the Hall
[Sherlock Holmes](entity:character-recall-character-sherlock-holmes-47892918a33b) questioned Sir Henry about his intentions, his inheritance, and the people who might benefit from his death. Sir Henry said he meant to go to [Baskerville Hall](entity:location-recall-location-baskerville-hall-74686e853850), and Holmes accepted the decision while insisting that he must not travel alone.
Holmes assigned [Dr. Watson](entity:character-recall-character-dr-watson-b880596dce5c) to accompany him, promising that he would direct the investigation from [London](entity:location-recall-location-london-420923d4a60a) and that Watson must report every relevant fact. The missing tan boot briefly reappeared in the hotel sitting-room, adding another unexplained turn to the case before the party prepared to leave.
the evening before the Devon journey
The Cabman’s Reversal
The cabman John Clayton came to [Baker Street](entity:location-recall-location-baker-street-718489af2ecf) after hearing that [Sherlock Holmes](entity:character-recall-character-sherlock-holmes-47892918a33b) had been asking about him. He reported that his fare had claimed to be a detective and had even given Holmes’s own name.
Holmes recognized the move as a clever counterstroke: the bearded watcher had anticipated the inquiry and used the cabman to mislead him. The lead collapsed, and Holmes admitted that he had been outplayed in [London](entity:location-recall-location-london-420923d4a60a). He sent [Dr. Watson](entity:character-recall-character-dr-watson-b880596dce5c) toward [Devonshire](entity:location-recall-location-devonshire-8d49b6809ab0) with a warning that the business was dangerous.
Saturday, after the London investigation
The Journey to Devonshire
[Dr. Watson](entity:character-recall-character-dr-watson-b880596dce5c) travelled to [Devonshire](entity:location-recall-location-devonshire-8d49b6809ab0) with [Sir Henry Baskerville](entity:character-recall-character-sir-henry-baskervil-291b9d3a250e) and Dr. [James Mortimer](entity:character-recall-character-james-mortimer-90803bd6b1ab). Before the train left, [Sherlock Holmes](entity:character-recall-character-sherlock-holmes-47892918a33b) told Watson to report facts rather than theories and warned him to keep Sir Henry armed, watched, and away from the moor at night.
The journey brought Sir Henry back to the landscape of his family’s inheritance. On arrival, the travellers saw soldiers searching for an escaped prisoner from [Princetown Prison](entity:organization-recall-organization-princetown-priso-baffcc18fee6), an additional danger on a moor already made ominous by the Baskerville legend.
the evening of the party’s arrival
The Hall Comes Into View
The carriage crossed bleak uplands and reached [Baskerville Hall](entity:location-recall-location-baskerville-hall-74686e853850), a vast, ivy-clad estate whose age and isolation unsettled [Dr. Watson](entity:character-recall-character-dr-watson-b880596dce5c). Sir Henry, by contrast, felt the force of his inheritance and imagined restoring the house with modern comforts.
[John Barrymore](entity:character-recall-character-cf1738892c97) and his wife received the new master. [Barrymore](entity:character-recall-character-barrymore-8b1731580967) said that he and his wife might leave, explaining that Sir Charles’s death had made the Hall painful to them. The house thus offered both an inheritance and a household already marked by grief and uncertainty.
the first night at Baskerville Hall
A Woman’s Sobs
In the night, [Dr. Watson](entity:character-recall-character-dr-watson-b880596dce5c) heard a woman’s muffled sobbing somewhere in the house. Sir Henry had heard it too, though he wondered if it had been a dream.
[Barrymore](entity:character-recall-character-barrymore-8b1731580967) claimed that neither of the women in the household could have been responsible. The next morning Watson saw that [Eliza Barrymore](entity:character-recall-character-f3a3db2b71fc)’s eyes were red and swollen, suggesting that the butler had lied to conceal her distress. The unexplained sorrow made the household seem less trustworthy than it first appeared.
the morning after the arrival at the Hall
Watson Meets Stapleton
While investigating whether [Barrymore](entity:character-recall-character-barrymore-8b1731580967) had received a telegram in person, [Dr. Watson](entity:character-recall-character-dr-watson-b880596dce5c) learned that the message had been handed to [Eliza Barrymore](entity:character-recall-character-f3a3db2b71fc) instead. The test therefore failed to prove that Barrymore had been in [Devonshire](entity:location-recall-location-devonshire-8d49b6809ab0) when Sir Henry was followed in [London](entity:location-recall-location-london-420923d4a60a).
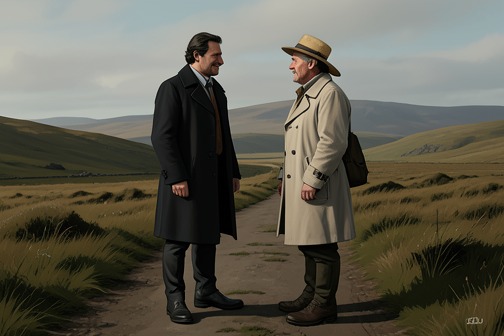
On the moor road Watson met [Jack Stapleton](entity:character-recall-character-4349fdf793a2), a naturalist who knew his name and asked whether [Sherlock Holmes](entity:character-recall-character-sherlock-holmes-47892918a33b) was involved. [Stapleton](entity:character-recall-character-stapleton-bfa291cb2f04) spoke dismissively of local belief in the hound, yet his interest in the case and his knowledge of Watson’s identity sharpened the sense that the neighbours were watching one another.
during Watson’s first walk with Stapleton
The Grimpen Mire
[Jack Stapleton](entity:character-recall-character-4349fdf793a2) led [Dr. Watson](entity:character-recall-character-dr-watson-b880596dce5c) across the moor and explained that the green patches ahead marked [Grimpen Mire](entity:location-recall-location-grimpen-mire-b8f302736a77), a treacherous bog capable of swallowing people and animals. As they watched, a pony struggled in the mire and disappeared beneath it.
[Stapleton](entity:character-recall-character-stapleton-bfa291cb2f04) claimed that he knew hidden paths through the bog and could reach the isolated ground beyond it. A strange, mournful cry then rolled across the moor. He suggested it might be a bird or a sound made by the bog, while acknowledging the peasants’ belief that it was the hound.
during Watson’s first encounter with Stapleton
Beryl’s Warning
As [Jack Stapleton](entity:character-recall-character-4349fdf793a2) chased a butterfly toward the bog, his companion hurried up to [Dr. Watson](entity:character-recall-character-dr-watson-b880596dce5c) and urgently told him to return to [London](entity:location-recall-location-london-420923d4a60a). She believed he was Sir Henry and warned him to leave the moor without explaining the danger.
When [Stapleton](entity:character-recall-character-stapleton-bfa291cb2f04) returned, the woman concealed what she had said and identified herself as his sister. She later caught Watson alone and urged him to take Sir Henry away, insisting that the Baskerville family was in danger. Her fear seemed genuine, but she would not provide a definite reason.
within days of Sir Henry’s arrival
Sir Henry Meets Beryl
[Jack Stapleton](entity:character-recall-character-4349fdf793a2) visited [Baskerville Hall](entity:location-recall-location-baskerville-hall-74686e853850), and Sir Henry soon became strongly attracted to [Beryl Stapleton](entity:character-recall-character-c79dad377c48). The two began to meet, though [Stapleton](entity:character-recall-character-stapleton-bfa291cb2f04) appeared displeased whenever Sir Henry showed her attention.
[Dr. Watson](entity:character-recall-character-dr-watson-b880596dce5c) noticed that Beryl often watched her brother for approval and that Jack seemed intent on controlling her. Their apparent courtship added a personal tension to the investigation, while Beryl’s earlier warning suggested that her guarded behaviour concealed more than family protectiveness.
during the first days on the moor
A Strange Man on the Tor
[Dr. Watson](entity:character-recall-character-dr-watson-b880596dce5c) and Sir Henry went out at night after discovering that [Barrymore](entity:character-recall-character-barrymore-8b1731580967) used a candle at a window to signal someone on the moor. They found that the signal answered from the darkness and learned from [Eliza Barrymore](entity:character-recall-character-f3a3db2b71fc) that it was meant for her brother, [Selden](entity:character-recall-character-selden-07b594a92427), an escaped prisoner hiding nearby.
Watson and Sir Henry pursued Selden across the moor but failed to catch him. In the moonlight Watson saw a tall, motionless stranger standing on a distant tor. The figure vanished before he could investigate, leaving open the possibility that another unseen watcher was living on the moor.
after the failed pursuit
Selden’s Hidden Refuge
[Eliza Barrymore](entity:character-recall-character-f3a3db2b71fc) confessed that she and [Barrymore](entity:character-recall-character-barrymore-8b1731580967) had been secretly feeding [Selden](entity:character-recall-character-selden-07b594a92427), her younger brother, while he hid on the moor. Their candle signals had helped him survive, and Sir Henry agreed not to alert the police because the couple hoped to send him overseas.
Barrymore then revealed that Sir Charles had been waiting at the moor gate to meet a woman whose initials were L. L. A burned letter in the study had contained an urgent request to meet at ten o’clock. This new clue connected a private appointment to the night of Sir Charles’s death.
the following day
The Stranger’s Other Watcher
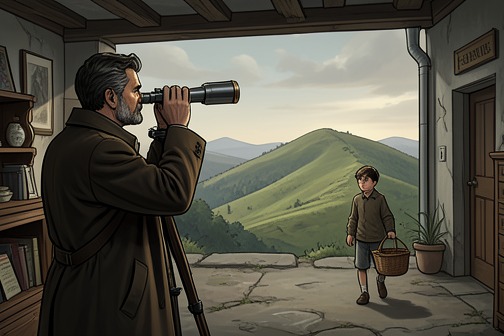
[Barrymore](entity:character-recall-character-barrymore-8b1731580967) warned [Dr. Watson](entity:character-recall-character-dr-watson-b880596dce5c) that [Selden](entity:character-recall-character-selden-07b594a92427) had spoken of another man hiding on the moor. The stranger seemed to be a gentleman and had a boy bringing him food, but Selden could not tell what he was doing.
Watson also learned that the initials L. L. belonged to [Laura Lyons](entity:character-recall-character-laura-lyons-e78be0e3908c) of [Coombe Tracey](entity:location-recall-location-coombe-tracey-d0410d83b4ef). Dr. [James Mortimer](entity:character-recall-character-james-mortimer-90803bd6b1ab) explained that she was the estranged daughter of [Frankland](entity:character-recall-character-frankland-0394f536031f) and that Sir Charles, [Stapleton](entity:character-recall-character-stapleton-bfa291cb2f04), and Mortimer had helped her establish a typing business. Watson decided to question her himself.
the day after learning the initials
Watson Questions Laura Lyons
[Dr. Watson](entity:character-recall-character-dr-watson-b880596dce5c) found [Laura Lyons](entity:character-recall-character-laura-lyons-e78be0e3908c) at her typing office in [Coombe Tracey](entity:location-recall-location-coombe-tracey-d0410d83b4ef). She acknowledged that Sir Charles had helped her but initially denied writing to him on the day he died or asking him to meet her.
When Watson quoted the surviving postscript, she admitted that she had arranged the meeting but insisted that she never went. She had wanted Sir Charles’s help with expenses connected to a possible divorce, then received assistance elsewhere. Her story was plausible, but her evasiveness left Watson doubtful that he had learned everything.
later that day
Frankland Spots the Food Boy
On his way back, [Dr. Watson](entity:character-recall-character-dr-watson-b880596dce5c) encountered [Frankland](entity:character-recall-character-frankland-0394f536031f), who was watching the moor through a telescope in the hope of finding [Selden](entity:character-recall-character-selden-07b594a92427). Frankland had seen a boy carry food toward a stony hill, and Watson realized that the boy might be serving the unknown man rather than the escaped prisoner.
Watson concealed his interest until he could leave Frankland’s house, then followed the boy’s route across the moor. The sighting gave him a practical lead to the stranger’s refuge and a chance to find out who had been watching the household.
at dusk that evening
The Hut on the Moor
Following the boy’s route, [Dr. Watson](entity:character-recall-character-dr-watson-b880596dce5c) reached an empty prehistoric stone hut stocked with blankets, food, and cooking supplies. A note inside reported that Watson had gone to [Coombe Tracey](entity:location-recall-location-coombe-tracey-d0410d83b4ef), proving that the stranger or his agent had been tracking Watson’s movements.
Watson hid inside, determined to confront the hut’s tenant when he returned. The evidence made the hidden man seem powerful and well informed, but it did not reveal whether he was an enemy or a possible ally.
at dusk, shortly after Watson enters the hut
Holmes Reveals Himself
The hut’s tenant arrived and turned out to be [Sherlock Holmes](entity:character-recall-character-sherlock-holmes-47892918a33b). He explained that he had been living secretly on the moor, with the boy Cartwright supplying him, while Cartwright also watched Watson and Sir Henry.
Holmes had kept his presence hidden so that [Jack Stapleton](entity:character-recall-character-4349fdf793a2) would not become more cautious. He had read Watson’s reports, praised his work, and explained that Watson’s movements had helped him follow the case without exposing his own investigation.
after Holmes and Watson reunite
Holmes Identifies Stapleton’s Wife
Holmes told [Dr. Watson](entity:character-recall-character-dr-watson-b880596dce5c) that the woman presented as [Jack Stapleton](entity:character-recall-character-4349fdf793a2)’s sister was actually his wife. [Stapleton](entity:character-recall-character-stapleton-bfa291cb2f04) had once run a school in the north, and Holmes had traced the failed school and its missing owners through professional records.
The false identity explained why Stapleton had tolerated Sir Henry’s attraction to Beryl while preventing any private intimacy. Holmes believed the warning to Sir Henry had come from Beryl, who was trying to protect him despite being under her husband’s control.
that evening on the moor
The Murder Plot Takes Shape
[Dr. Watson](entity:character-recall-character-dr-watson-b880596dce5c)’s account of his interview with [Laura Lyons](entity:character-recall-character-laura-lyons-e78be0e3908c) clarified how [Stapleton](entity:character-recall-character-stapleton-bfa291cb2f04) could have arranged Sir Charles’s meeting at the gate. Holmes suspected that Stapleton had used Laura’s hopes for a divorce to get her to summon Sir Charles, then persuaded her not to attend.
Holmes judged the case to be deliberate murder but warned that suspicion was not yet proof. He planned to confront Laura with the truth about Stapleton and needed further evidence connecting the man to the hound before he could bring him to justice.
the night Holmes reveals himself
The Hound Kills Selden
While Holmes and Watson spoke in the hut, they heard a terrible scream and a deep, threatening sound from the darkness. They ran toward it, fearing that Sir Henry had been attacked, and found a man dead below a rocky slope.
The victim was [Selden](entity:character-recall-character-selden-07b594a92427), not Sir Henry. He had been wearing clothes given to him from Sir Henry’s wardrobe, and Holmes concluded that the hound had followed the scent of the baronet’s clothing. Selden’s death confirmed that the animal was real and dangerous, but it did not yet establish a provable case against [Stapleton](entity:character-recall-character-stapleton-bfa291cb2f04).
immediately after Selden’s death
Stapleton Sees Holmes
[Jack Stapleton](entity:character-recall-character-4349fdf793a2) arrived at the scene and found Holmes and Watson beside [Selden](entity:character-recall-character-selden-07b594a92427)’s body. Holmes concealed his suspicions and let [Stapleton](entity:character-recall-character-stapleton-bfa291cb2f04) accept an innocent explanation for the death, while the naturalist carefully asked whether they had heard the hound.
Stapleton’s composure suggested that he had expected Sir Henry to be the victim. Holmes recognized that the man’s nerve was exceptional, and the encounter made it urgent to catch him in a situation that could connect him to the animal and the attempted murder.
the night Holmes returns to Baskerville Hall
The Family Portrait’s Secret
At [Baskerville Hall](entity:location-recall-location-baskerville-hall-74686e853850), [Sherlock Holmes](entity:character-recall-character-sherlock-holmes-47892918a33b) examined a portrait of [Hugo Baskerville](entity:character-recall-character-hugo-baskerville-d866e35dd89c) and saw that the family likeness resembled [Jack Stapleton](entity:character-recall-character-4349fdf793a2). The resemblance supported the conclusion that [Stapleton](entity:character-recall-character-stapleton-bfa291cb2f04) was descended from the Baskervilles and had a claim to the inheritance.
Holmes recognized that the portrait supplied a motive missing from the evidence. He still needed proof that Stapleton had used the hound to attack Sir Henry, but he believed that the next night’s plan could force the crime into the open.
the morning after Selden’s death
Holmes Sets the Trap
Holmes told Sir Henry that he and [Dr. Watson](entity:character-recall-character-dr-watson-b880596dce5c) had to return to [London](entity:location-recall-location-london-420923d4a60a), while secretly arranging to come back with [Inspector Lestrade](entity:character-recall-character-inspector-lestrade-4f319ef5094d). He instructed Sir Henry to dine at [Merripit House](entity:location-recall-location-merripit-house-f3c69720b13c) and walk home alone by the direct path, refusing to stray from the route.
The apparent departure was meant to persuade [Stapleton](entity:character-recall-character-stapleton-bfa291cb2f04) that Sir Henry was unprotected. Holmes also sent Cartwright to London with a false message and went with Watson to question [Laura Lyons](entity:character-recall-character-laura-lyons-e78be0e3908c), whose testimony could help complete the case.
the afternoon of the planned dinner
Laura Lyons Exposes Stapleton
Holmes confronted [Laura Lyons](entity:character-recall-character-laura-lyons-e78be0e3908c) with proof that the woman known as [Beryl Stapleton](entity:character-recall-character-c79dad377c48) was [Jack Stapleton](entity:character-recall-character-4349fdf793a2)’s wife. Laura realized that [Stapleton](entity:character-recall-character-stapleton-bfa291cb2f04) had deceived her with a promise of marriage and had used her to secure the meeting with Sir Charles.
She admitted that Stapleton dictated the letter, persuaded her not to keep the appointment, and frightened her into silence after Sir Charles died. Laura also said she had never intended harm to Sir Charles. Her confession connected Stapleton to the fatal appointment and supplied a crucial motive and method.
that night, during Sir Henry’s dinner at Merripit House
The Final Ambush
Holmes, Watson, and [Inspector Lestrade](entity:character-recall-character-inspector-lestrade-4f319ef5094d) returned to the moor and hid near [Merripit House](entity:location-recall-location-merripit-house-f3c69720b13c) while Sir Henry dined with [Jack Stapleton](entity:character-recall-character-4349fdf793a2). Watson watched [Stapleton](entity:character-recall-character-stapleton-bfa291cb2f04) leave the dining-room, unlock an outbuilding, and enter briefly; a strange movement inside suggested that the hound was being kept there.
Beryl was nowhere visible, and a heavy fog began creeping across the moor from [Grimpen Mire](entity:location-recall-location-grimpen-mire-b8f302736a77). Holmes feared that the fog would cover the path before Sir Henry could reach the ambush, potentially ruining the plan and placing him in immediate danger.
later that night on the path from Merripit House
The Hound Attacks Sir Henry
Sir Henry emerged from the fog and walked alone along the path. A huge black hound, its face and body glowing with an unnatural fire, burst from the mist and chased him down the track.
Holmes and Watson fired, then ran after the animal as it sprang upon Sir Henry. Holmes emptied his revolver into the hound, killing it before it could tear at the baronet’s throat. Sir Henry survived, though the attack left him shaken and nearly insensible.
immediately after the hound is killed
Phosphorus Revealed
Holmes and Watson found that the hound’s terrifying glow came from phosphorus smeared on its muzzle and fur. The animal was a real, powerful dog, not a supernatural creature, and its luminous appearance had been designed to make the family legend seem true.
Sir Henry had no wound, but Holmes recognized that his terror had nearly made the attack fatal. With the hound dead, the remaining task was to find [Stapleton](entity:character-recall-character-stapleton-bfa291cb2f04) and establish his responsibility.
during the search of Merripit House
Beryl Found Bound
Holmes, Watson, and Lestrade rushed into [Merripit House](entity:location-recall-location-merripit-house-f3c69720b13c) but could not find [Jack Stapleton](entity:character-recall-character-4349fdf793a2). In a locked upstairs room they discovered Beryl tied to a post, gagged, and bruised, unable to warn Sir Henry about the attack.
Beryl confirmed that Sir Henry was safe and revealed that [Stapleton](entity:character-recall-character-stapleton-bfa291cb2f04) kept the hound on an island in [Grimpen Mire](entity:location-recall-location-grimpen-mire-b8f302736a77). She explained that the pair had marked a narrow route through the bog with guiding wands, but the fog had made it impossible to follow that route safely that night.
the morning after the hound’s death
Stapleton Disappears in the Mire
After the fog lifted, Beryl led the investigators toward the path [Stapleton](entity:character-recall-character-stapleton-bfa291cb2f04) had used through [Grimpen Mire](entity:location-recall-location-grimpen-mire-b8f302736a77). The bog repeatedly threatened to pull them under, and Holmes found Sir Henry’s missing black boot caught in the slime.
They reached the island refuge where the hound had been kept, but found no trace of Stapleton. The path offered no reliable footprints beyond the mire; the investigators concluded that he had likely sunk into the bog and died while trying to escape.
during the search after Stapleton’s disappearance
The Hound’s Lair
At the abandoned mine on the island, the investigators found the remains of the place where the hound had been confined. A chain, gnawed bones, and the skeleton of a curly-haired spaniel showed the cost of keeping the animal hidden.
Holmes explained how [Stapleton](entity:character-recall-character-stapleton-bfa291cb2f04) had used the family story, the dog’s savagery, and the phosphorus disguise to frighten his victims. The hound had been kept out of sight in the mire and brought out only when Stapleton believed the plan was ready.
the weeks after the final attack
Sir Henry’s Recovery
The attack and the revelation about Beryl left Sir Henry in a high fever and in need of care from Dr. [James Mortimer](entity:character-recall-character-james-mortimer-90803bd6b1ab). His feelings for Beryl had been sincere, and learning that she had been presented under a false identity deepened the shock of the ordeal.
Sir Henry and Mortimer later travelled together around the world, a journey intended to restore his health and nerves. The events at [Baskerville Hall](entity:location-recall-location-baskerville-hall-74686e853850) had ended, but recovery required distance from the estate and from the terror that had nearly killed him.
late November, after the Devonshire case
Holmes Reconstructs the Conspiracy
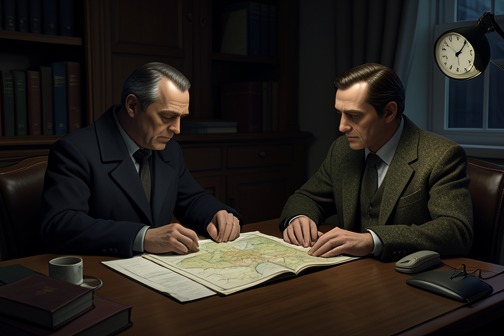
Back in [Baker Street](entity:location-recall-location-baker-street-718489af2ecf), [Dr. Watson](entity:character-recall-character-dr-watson-b880596dce5c) persuaded [Sherlock Holmes](entity:character-recall-character-sherlock-holmes-47892918a33b) to revisit the case after Sir Henry and Dr. [James Mortimer](entity:character-recall-character-james-mortimer-90803bd6b1ab) called on them. Holmes explained that [Jack Stapleton](entity:character-recall-character-4349fdf793a2) was the son of Rodger Baskerville, had taken the name Vandeleur and later [Stapleton](entity:character-recall-character-stapleton-bfa291cb2f04), and had come to [Devonshire](entity:location-recall-location-devonshire-8d49b6809ab0) with his wife disguised as his sister.
Stapleton’s aim was to inherit the Baskerville estate. He befriended Sir Charles, learned of the weak heart and the family legend, then used a savage dog to exploit both. The portrait had revealed the family resemblance, while Holmes’s inquiries established the concealed identity that gave Stapleton his motive.
Holmes’s retrospective in late November
The Murder of Sir Charles Explained
Holmes set out how [Stapleton](entity:character-recall-character-stapleton-bfa291cb2f04) used [Laura Lyons](entity:character-recall-character-laura-lyons-e78be0e3908c) to arrange a meeting with Sir Charles at the moor gate. After preventing Laura from attending, Stapleton brought the hound to the gate, where it chased the old man down [Yew Alley](entity:location-recall-location-yew-alley-98513a758bd5). Sir Charles died of terror and heart disease before the animal reached him.
The hound had run along the grass, leaving no trail on the path, and its paw prints near the body had been mistaken for evidence of the legend. Stapleton called the animal away and returned it to its hiding place, leaving the coroner with an apparently natural death and the district with a renewed fear of the Baskerville curse.
Holmes’s retrospective in late November
The London Warning and the Stolen Boot
Holmes explained that [Stapleton](entity:character-recall-character-stapleton-bfa291cb2f04) had followed Sir Henry in [London](entity:location-recall-location-london-420923d4a60a) and tried to obtain an item of clothing whose scent would let the hound track him. The first stolen boot was new and useless, so it was returned; an older boot was taken instead.
Beryl, afraid of her husband but determined to warn Sir Henry, assembled the anonymous message from words cut out of [The Times](entity:organization-recall-organization-f40c542d0312). Stapleton’s disguise, the failed boot theft, and the warning letter had seemed like disconnected mysteries, but together they revealed the struggle between the plotter and the woman trying to obstruct him.
Holmes’s retrospective in late November
Holmes’s Hidden Investigation
Holmes recounted that he had recognized a woman’s perfume on the warning letter and suspected a connection to the Stapletons before travelling to [Devonshire](entity:location-recall-location-devonshire-8d49b6809ab0). He kept his presence secret, living in a moorland hut and using Cartwright to track Watson and obtain supplies.
Watson’s reports helped Holmes identify the couple and understand the local mysteries, including [Barrymore](entity:character-recall-character-barrymore-8b1731580967)’s aid to [Selden](entity:character-recall-character-selden-07b594a92427). Even after the convict died, Holmes lacked evidence strong enough for court. He therefore used Sir Henry as bait, accepting the risk in order to catch [Stapleton](entity:character-recall-character-stapleton-bfa291cb2f04) in the act and make the case provable.
after the hound’s attack
Stapleton’s Failed Escape
Holmes believed that [Stapleton](entity:character-recall-character-stapleton-bfa291cb2f04) fled toward his refuge in [Grimpen Mire](entity:location-recall-location-grimpen-mire-b8f302736a77) when he realized the plot had failed. Beryl’s account of the marked route made it possible to search the bog, but the fog and unstable ground prevented a pursuit that night.
No body was recovered, yet the absence of footprints beyond the mire and the nature of the terrain led Holmes to conclude that Stapleton had been swallowed by the bog. His disappearance closed the case without a trial, leaving the investigators to reconstruct the final moments from what the moor had preserved.
at the end of Holmes’s retrospective
The Unclaimed Inheritance Plan
[Dr. Watson](entity:character-recall-character-dr-watson-b880596dce5c) asked how [Stapleton](entity:character-recall-character-stapleton-bfa291cb2f04) could have claimed the estate after living under another name so close to [Baskerville Hall](entity:location-recall-location-baskerville-hall-74686e853850). Holmes admitted that the answer could not be known, though Beryl had heard her husband consider several possibilities, including claiming the fortune from abroad or using an accomplice.
The unresolved practical question did not undo the evidence of the murder plot. Holmes set the grim case aside and invited Watson to the opera, turning from the dangers of the moor to another evening in [London](entity:location-recall-location-london-420923d4a60a).